Wednesday, January 19, 2011

Step 4) Space Shrimp Sculpting!

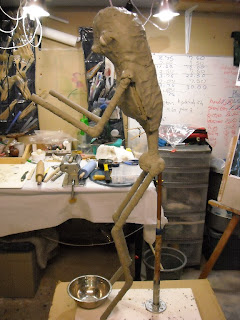
Applying the first layers of clay – I would roll out big slabs of clay between two sticks to get an even thickness. I have two sets of sticks I use (the smaller ones, which result in thinner slabs,are to the right in the first pic). I’ve also been experimenting with putting clay through an old pasta machine which you can just see the edge of next to the rolling pin (right). The pasta machine works alright but the clay sticks to it a little too much.


I would take a slab of clay, warm it with a hairdryer till it was soft, and then wrap it around the armature. I would either cut away the excess or warm it some more and blend the edges in.

By the way – the clay I’m using is primarily Chavant Soft (along with one block of LeBeau Touche).


Temporarily testing possible eye placement (yes, those are ping pong balls)...


More bulk added, and the placement of the first details sketched in…


This is again why I didn’t glue the arms into a fixed position – so I could move them out of the way or remove them all together (see right) to get at other areas of the sculpt.


With the ping pong balls eye blanks back in and more bulk added to the head. (Although something was bugging me at this point – he was starting to look more like a Corythosaurus than a Prawn…)

+=???

Further bulking out of the head and torso…


And this is suddenly where it all started to go horribly wrong…

No comments:

Post a Comment