Saturday, February 26, 2011

Just showing a little leg today ...

A real mini-post today as all I did was go in and make the very rough right leg from the last session match the slightly more refined left leg.


I'm not really happy with that right leg but it's good enough for now. Further refining can come later.


Tomorrow CJ gets some nice beefy arms! ;)

Friday, February 25, 2011

CJ, Can You Give Me A Leg Up?

Technically I'm combining a couple of sessions into one post here. The first one was really not that productive - so unproductive in fact that I'm not going to bother posting the pics as there was very little visible progress.

Basically, as was my plan, I continued roughing in the sculpt some more as I made my way down CJ's torso. A tweak here, a tweak there but it was one of those times where I really wasn't "feeling it" and by the time Poirot had solved the mystery I was definitely ready to stop for the day...

(I like to listen to audio-books and DVD commentaries while I sculpt. While working on CJ I've been listening to a steady diet of Agatha Christie stories and Sherlock Holmes radio plays. Besides being entertaining it works as an excellent timing tool - I start a fresh CD when I begin a session each day and when it's over I know I've clocked at least 60 - if not 80 - minutes of sculpting time).

So my first session in a week was unsatisfactory. The next session went much better though! I focused mainly on blocking in his limbs (and in particular his legs).

Here I'm refining the curve of the hips, and the shape of the abdomen, while adding the strange back to front groove that crosses the pelvic area...

All of CJ's limbs had just a thin uniform layer of clay on them. I know Prawns are skinny and lanky but they're not THAT spindly. So the limbs needed bulking out.

I rolled out a few slabs of clay with my thicker set of sticks and roughly wrapped each leg...


Then I concentrated on making the shins more triangular, to match the reference photos...


The "thigh" is semi-triangular but it also has a bulging, rounded section about 3/4 of the way up. You can see the refined leg on the left and the one I still need to fix on the right.


I'm jazzed now! Not perfect quite yet - but again I'm trying to keep the whole sculpt at a similar level of completion so this is good for now. I don't want to add perfect, minuscule detailing to one area only to realize it's out of proportion with all the other body parts.

But it's looking good!


So next time - onto the right leg!

Monday, February 14, 2011

Well it IS Valentine's Day...

... and I couldn't quite let the day go by without expressing some love and gratitude to the many people who are helping and supporting me, both with CJ in particular, and my goal of becoming an SFX artist in general.

(Those with low tolerance for 'mush' may wish to leave now ... ;) )

I want to thank everyone from my parents who don't mind the fact they have 3 ft of Prawnling sitting in the middle of their basement to the many friends and colleagues who've offered their advice and expertise on any number of items I've needed to pick their brains about.

In addition I have a WONDERFUL set of "cheerleaders" who are always ready with just the right words of encouragement, right at the moment I'm starting to doubt myself. I couldn't do this without you guys!

And for this particular project I do have to thank one particular person. She goes by many names but I like to call her "my best friend" ;)

From the beginning, when I was waffling over getting going, I would get emails saying "Are you working on CJ yet?" She offers a constant sounding board for all sorts of ideas (crazy or otherwise - like the one about starting this blog!) and has listened to me rant and rave and cheer. I couldn't ask for a better "Bestest Prawn Pal" ;)

And speaking of this blog... I have to say I've surprised myself. I debated with myself for weeks over whether I was going to bother with it or not (I figured CJ would be enough work on his own) but now that we're a few weeks in I'm finding I'm really enjoying the process of doing the blog in and of itself. I find I come out of my workshop all excited about writing down my thoughts on CJ for the day.

CJ (and the blog) are both rapidly becoming a true labour of love.

Sculpting To Soothe The Soul...

So I made sure I made some time for CJ yesterday. Barely an hour but it felt really good (and no more procrastination-guilt).

I mentioned in passing in my last post that I wanted to come up with a way of making sure that any further photos I took for the purpose of comparing the sculpt against the reference photos I took from the same position. This way I’d know that any differences were due changes in the sculpture, and not from seeing things from slightly different angles, etc.

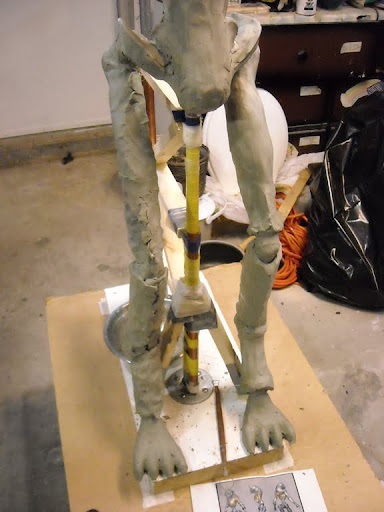
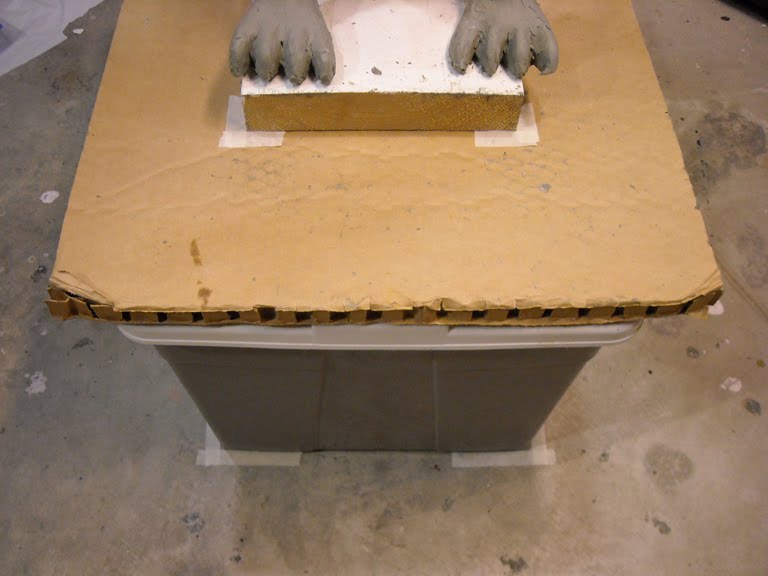
So I started off the session yesterday by marking CJ’s current position on the floor of the workshop. Now, should I have to move him out of the way for something I’ll know I’ll get him back in the same spot.


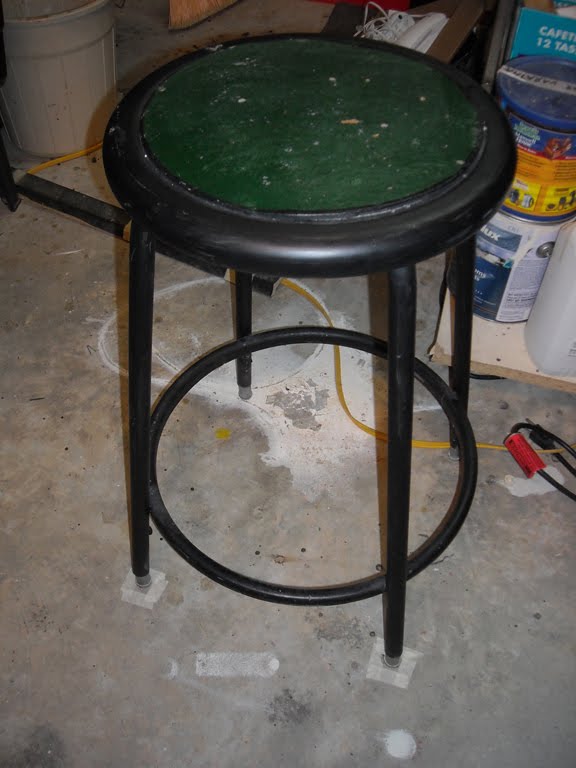
Then I moved a stool back a few feet from CJ and marked its position as well (and now you can see my father’s side of the workshop...).


It was especially important to mark the stool’s position since I move/use it quite frequently. I don’t always sit on it but I do use it a lot – it’s at the exact perfect height to hold tools and a small bowl of clay so it saves me having to step back and/or having my hands full when I want to switch rapidly between two or three tools.

Anyways, with the stool on the other side of the room, I can sit on it and fit CJ in his entirety comfortably into the viewfinder of the camera. By lining his base up with the bottom corner of the screen now I know I’m taking the shots from pretty much the same place each time.

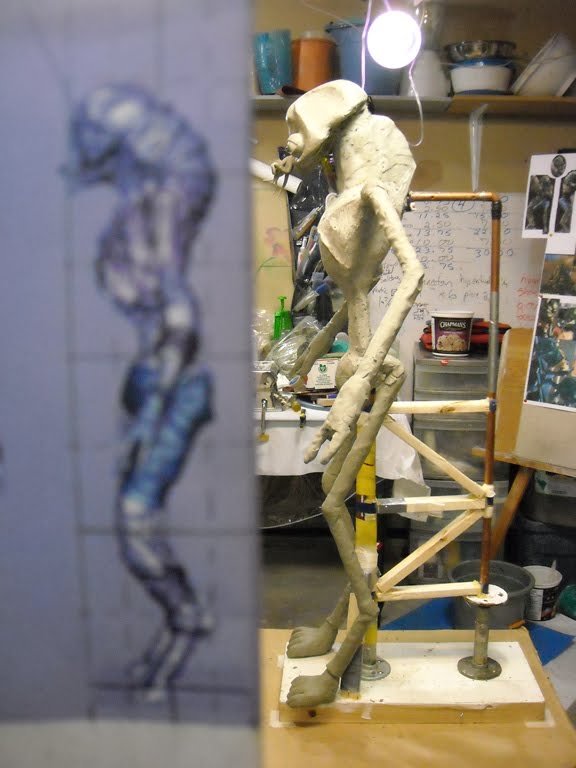
And when I don’t want to go back into the other room and run through all the trouble of taking the pic into Photoshop to compare, I’ve discovered I can do this…


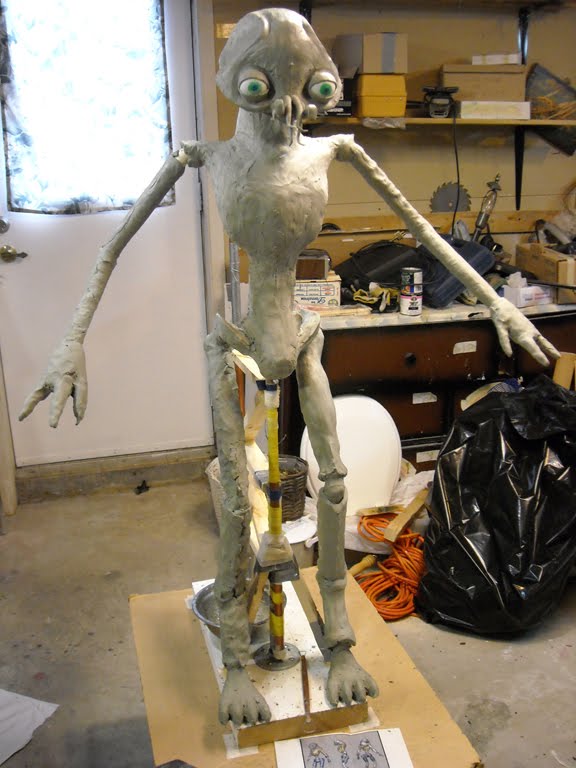
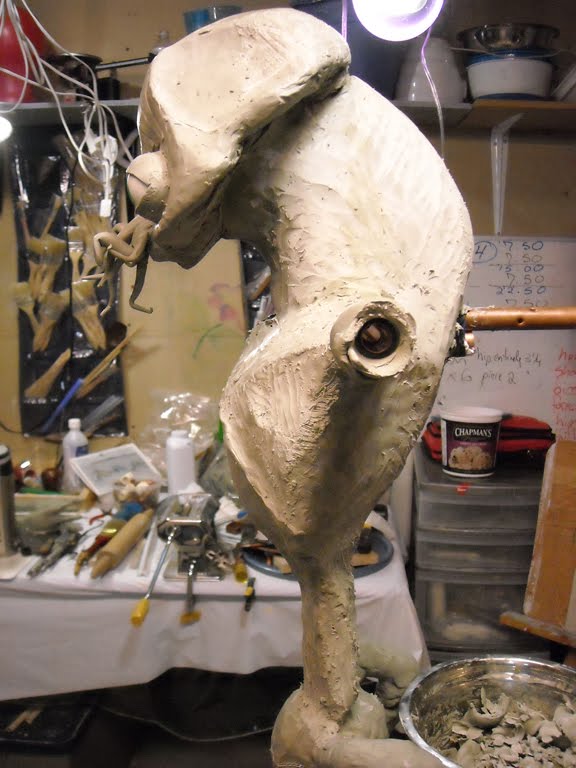
Crude, yes, (it's just me holding the reference pic up in front of the camera, adjusting the distance till it and the sculpt looked the same size) but quite effective. For instance I could see yesterday that the shape of CJ’s head wasn’t quite right. It needed to be higher in the front and rounder in the back…

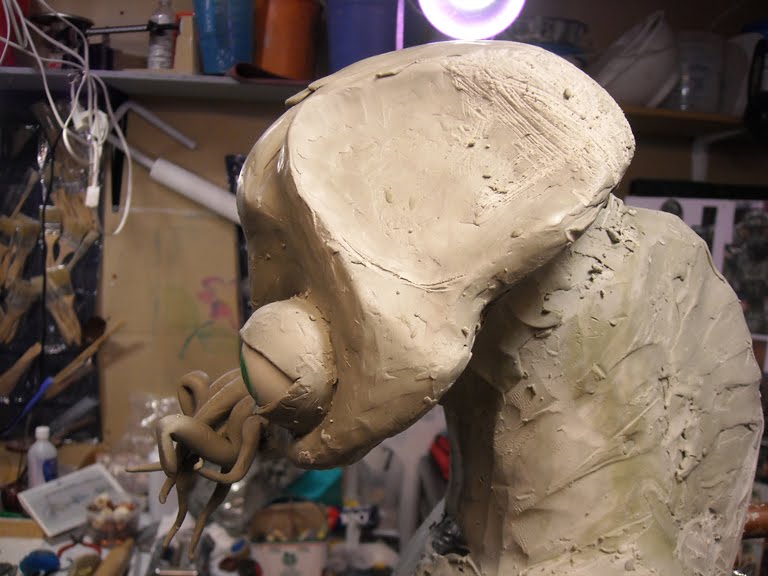
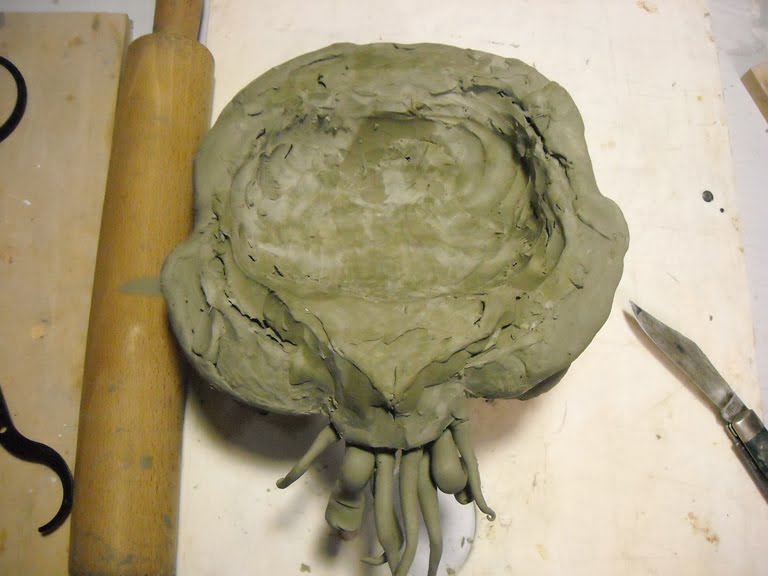
So I started in on rounding off and reshaping his head.


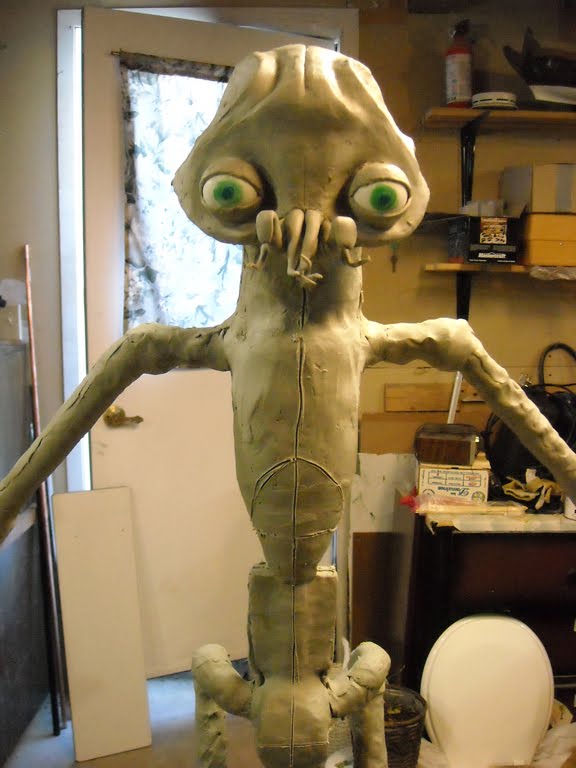
I was really having fun with it, but I stopped myself before I could get too carried away. One of the sculpting tips I received at the IMATS in Europe was to block in and refine the WHOLE general shape first before creating too much detail in one area. I’ve already gone a bit further with the head than the rest of CJ’s body than I probably should have but that’s OK – it’s letting some of his “personality” come through, and I find it more motivating to work on him now that he has a recognizable face. But I really do need to bring the rest of the sculpt up to the level of the head now, before proceeding any further.

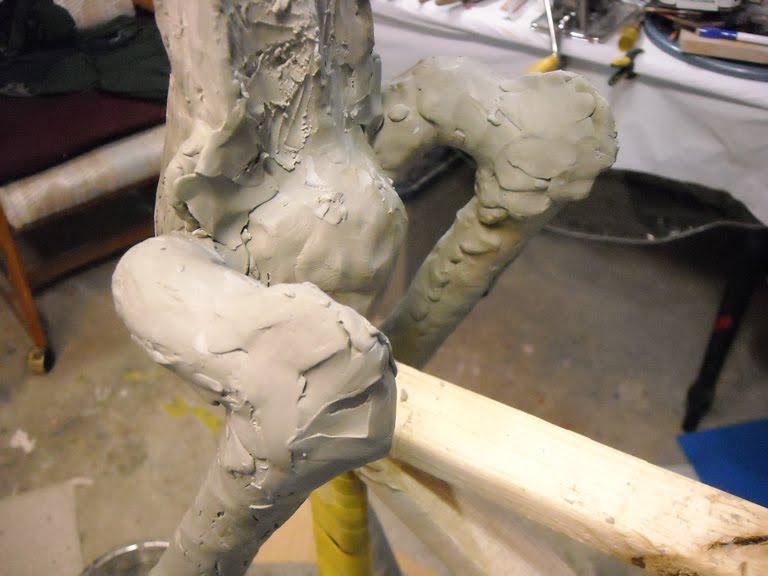
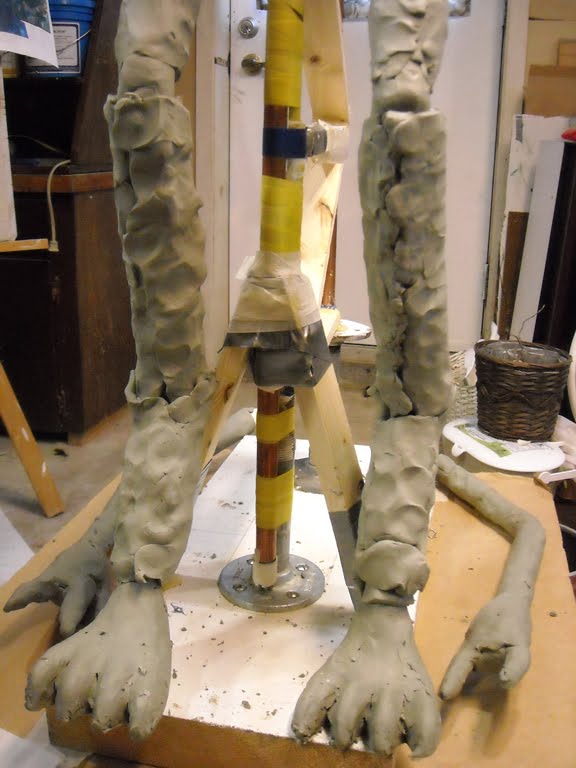
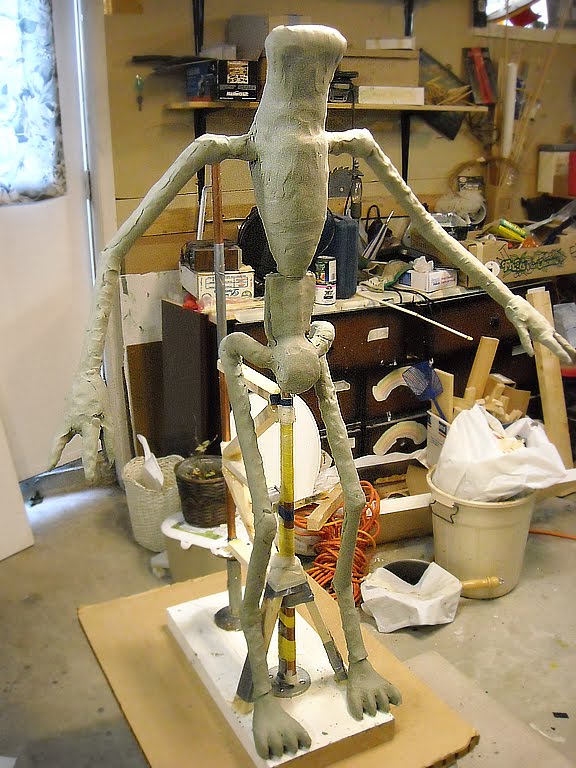
So I removed CJ’s arms for now to have easier access to his torso, and filled in more of the back of his neck.


I think the plan for the next little bit is to work on refining his torso, then move onto the limbs before circling back to further refine his head and neck again.

Friday, February 11, 2011

Christopher isnt going to like me too much...

… I keep decapitating his kid!

I started off the session using the same Photoshop overlay method I’d used with the new armature before to check how my sculpt was doing so far. Sure enough, I still had CJ’s head in too upright a position as well as a few other inaccuracies (like too much build up on the back of his neck)


So I popped CJ’s head off to try again…

Poor little Prawnling – I’ll get it right one of these days! I swear!

This involved hollowing out the underside of the “skull” once more, as well as rounding off the neck again.

I took all the clay “shavings” I’d taken from CJ’s head and neck and warmed them up really well under the hair dryer till they were extremely soft (and managed to do it WITHOUT gassing myself this time! I’ve been much more careful lately about running the hair dryer too long without taking precautions and so far my headache hasn’t returned).

I then used the very soft, and slightly sticky clay “gloop” like glue to hold CJ’s head in its new position.

I filled in the gaps with more “gloop”, just enough to stabilize things as you can see, but I didn’t go overboard in case I needed to reposition CJ’s head again.


I ended off by taking another picture to compare in Photoshop. It LOOKS alright but I think I’m going to have to come up with a way of making sure I take each of these comparison photos from the exact same position and angle to be doubly sure I’ve got it right. I think slight changes in the picture angle are throwing things off.


(And that was, as you can see, nearly a week ago… *scowl*…

I’m trying to take the “you eat an elephant a bite at a time” approach, chipping away at CJ and my other various projects a little every day. Obviously I haven’t QUITE gotten the rhythm down yet – I keep taking little bites but the problem is I have too many elephants!


Yeah, yeah Wikus - I know!

I work on more creative projects each day than I used to… In keeping with a “just do it!” mantra I managed to squeeze in SOME sort of drawing, sculpting or painting practice everyday. I just don’t always get to practice ALL of them. But I’m getting there.

So we’re going to have some quality time together this weekend CJ – I promise!)

Sunday, February 6, 2011

Carver or Slapper?

I’ve heard it said that, even when working with a very malleable medium such as clay, sculptors come in two types – carvers and slappers. Carvers like to start with a big pile of clay, more than they need, and carve away the excess, until the right shape is revealed. Slappers, despite the implied haphazardness of the name, build up forms more precisely over their armature by applying small bits of clay in layers until they have the shape they want. Now obviously all sculptors working in clay do a bit of both (if they cut away too much I don’t think any ‘carver’ is averse to slapping on some more material to fix the problem) and often switch styles depending on the nature of the sculpt itself, but there is still a tendency to prefer one method over the other.

After the last two session (which I’ve combined here into one entry, as the results and my mindset where almost the same for both) I’m starting to think I’m definitely a carver. Even when I try and build the form up to the exact size I want on purpose, I somehow tend to go overboard. It happened the first time around (remember “CJ The Corythosaurus”?) and it’s happening again now…

This was where I started on Friday. You can see me adding some rolled out slabs of clay to the sides of CJ’s chest to help rough in the shape.


And the view from the back, after smooshing in some very soft clay to help stabilize things and fill out his back…

Now according to my diagram and my calipers this is how wide his chest is supposed to be. But from the side he just looked too “pointy” and it wasn’t meshing well with the side view ref shot I have.


So I took my thumbs and a stick tool and started to round the shapes off as well as carving back a lot from the upper chest and neck area…

That unified the shape a bit more but it still wasn’t looking quite right. I tensed up and an annoying little voice in my head was going “Wrong! It’s Wrong!” So I had to do some mental coaching. After being away it’s taking me a little bit to get used to the feel of things again – both in terms of manipulating the clay and getting my head around what I’m trying to do. Especially my new “slow and steady” working mindset.
If I were working to a set deadline I’d already be tempted to go “well – according to the diagram & calipers this is right and I don’t have time to fix it!”

But instead I took some deep breaths and slowed myself down.

”It’s OK… Take all the time you want…Remember to enjoy the process as much as the end result. Just enjoy moving the clay if that’s what you want to do. It IS clay - you can redo it as much as you want.”

And after that little self-pep talk I DID feel better.

I gave myself the same talk when I started on this afternoon’s session. I’m still struggling with getting the shape right but I’m not stressing about it like I did on Friday – it will come.


Even the thought I was going to have to redo at least part of the head wasn’t so daunting. “You did it once, you can do it again, and this time it will be better.”


I carved back quite a lot of clay, and in fact gave up on trying to keep such a clear division between the main part of the chest, the indent where secondary arms sit, and CJ’s waist. I can add that back later. I started to get a curve I was happy with on CJ’s left side, and added a bit of clay to emphasize the chest ridge. Not sure if it’s actually in the right spot though or if it’s going to stay there for any length of time.


Actually I don’t think these pics show too much progress physically – in fact they might totally end up carved back to almost nothing again – but I think they are showing some progress “mentally”.

I’m just… exploring for now…

Thursday, February 3, 2011

CJ! I'm HOME!

Yes, I got back to the Great White North late Monday night, just before it became a LOT whiter due to an extra large snowstorm slamming into the north-eastern US/central-south-eastern Canada.

My Euro trip did me a LOT of good, although I do have to sheepishly admit that all my concerns about getting CJ done in time to take with me were all for naught. In hindsight it would have been a logistical mess to fit him securely into my luggage and still have room for more than one change of clothes and toiletries for the three weeks I was away. Plus explaining him to security would not have been fun (do-able, probably, but not fun).

But, between just taking a break and recharging my own batteries, plus being inspired by the various sites (everything from the breathtaking art pieces in the Louvre, the BIZARRE animals in the Natural History Museum in London, and a number of film props both at the International Make-Up Artists Tradeshow and an SFX/Miniatures museum in Lyon, France) I just couldn’t wait to get back to working on CJ.

It’s still taken me two days to do so, since I came home with both jet-lag AND a bad head cold but I finally made it into the workshop this morning and I couldn’t be happier. My prediction that my enthusiasm would return as soon as CJ started to look more like a Prawn than a set of pipes definitely came true.

This is where I had left off - just the basic armature covered with an even layer of clay.


The first thing I wanted to do was reattach the head I'd saved from my previous sculpt. Here's the underside of the head after using various loop and rake tools to widen the existing hole so I could fit it back on the current sculpt.


I put the clay shavings I'd scrapped from the underside of CJ's head under the hairdryer and let them get really soft, almost liquid. I put a generous glob (that's a highly technical term that is) on the stump of the neck and then fitted the head in place. The super-soft clay acted like glue, holding the head in position like so...


I then used more of the really soft clay to fill in and secure the rest of the gaps between the head and neck. Then I further bulked out the back of the neck to help start give CJ that crazy exaggerated curve to his spine, that caused me so many problems with the armature.


This is perhaps not the best picture to demonstrate it but after the neck, the next area I started to bulk out was CJ's chest to help extend that crazy curve...


At this point though I had to stop. Not because I wanted to, but unfortunately other duties called. I can't wait to get back to work on him tomorrow though!

Tuesday, February 1, 2011

That's A Wrap!

Yes, time to get back to the actual sculpting! Poor CJ – have you been cold without a nice layer of clay to keep you warm? ;)
(Hmm – and they never did hint in the film whether the Prawns were endothermic or exothermic. Although given how active they were I would assume they were warm-blooded….)

Anyways - I was rather amused to notice that up to this point (or I guess I should say up to the point I stopped sculpting before, I had actually used very few of the large and rather rag-tag collection of sculpting tools I have). Here’s a shot of the main ones so far (with the exception of a few rakes, and my rolling pin).


Pretty basic no? The most complex is the set of proportional calipers to the left (I LOVE my calipers!). Depending on where I insert the screw that holds them together I can set them at a 1:1, 1:1.5, 1:2, 1:3, or 1:4 ratio which comes in VERY handy indeed.

The first layer in place on the torso!


You’ll notice I went back and wrapped wire around CJ's limbs. I don’t know whether it made any difference the first time around but I would have hated to have left it off, gotten into the sculpting, and then discovered I had to do the arms and legs over again because the clay kept shifting on the surface of the pipes.

This is also the point where I was nearly Poisoned-By-Prawnling.

I believe I mentioned before that I use a hairdryer held in place in a vise-top worktable to warm my clay like so?


Well up to this point I’d been turning the hairdryer on in short bursts to soften the clay, but not leaving it on a long time. The clay I’m using is a soft grade, and fairly malleable even at a low temperature. However on this day I was finding it really hard to roll out the clay, probably because the temperature had finally dropped outside to something resembling what you would expect for Canada around New Year’s (ie. FOOKIN’ COLD). My workshop is in our unfinished basement, so although everything was well above freezing it was still pretty chilly in there. As a result I had the hairdryer on, warming the clay, for pretty much the entire time I was in the shop.

I noticed at the end of my hour/hour and a bit session (roughly the length of a single audiobook CD) that I was feeling a bit woozy. In fact I had a downright nasty headache that lasted a good hour after I’d left my workshop. The only thing that occurred to me that might have caused it was the smell of the softening clay (although it is supposed to be non-toxic, and it is standard practice for sculptors to warm/soften oil-based clays with heat). I hadn’t had this problem before though so I think it was a result of having the heat on much longer than usual.

I thanked my stars it wasn’t a more serious safety screw-up than that, and resolved to stick to short bursts of heat and/or leaving the back door open for ventilation.

For these first few layers, while I roughed in the shape, I rolled out the slabs like so (the first pic are smaller pieces cut for the hands but it gives you the general idea), then wrapped them around the area I wished to cover and trimmed them if necessary before blending down the edges.


And after a LOT of rolling, and trimming, and blending – the first layer is complete!


(Notice the OPEN door, as well as the re-attached Prawnling feet)

And that IS a wrap! We are now officially caught up to where I left the project before leaving for my three-week trip to Europe. If this entry has posted successfully then I should be home any day now, high on the thrill of my adventures, and ready to get back to the task of bringing this little Prawnling to life!

Hopefully you’ve enjoyed the ride so far – I hope you stick around!

Cheers!

Kate