Monday, January 31, 2011

I Want That Arm

(Which, by the way, is a track title on the short-but-excellent D9 score by Clinton Shorter)

I finally got around to giving CJ his arms back. I used 45 degree connectors for his elbows this time instead of 90 degree ones – I thought it matched the reference photos more closely as well as gave me more working room around the torso without having to completely remove the arms.


The black tape marks indicate CJ’s wrists.


These will be CJ’s fingers…


Building out the “wrists” so that the fingers stick out at the right angle…


Attaching the fingers…


Bulking the hand out with foil and electrical tape.


I think it’s finally time to get the clay back out!


Friday, January 28, 2011

CURSES! CJ! FOILED AGAIN!

(Oh come on – how often is it you get to say that and actually MEAN it! ;) )

And I was cursing a little bit. Whether you want to blame the holidays in general (or the nasty cold I got over said holidays) or perhaps the fact I was starting to realize I probably wasn’t going to get the sculpt for CJ done before I left for Europe (and thus dashing hopes of having some nice pics of CJ in my portfolio for when I went to the International Make-Up Artists’ Tradeshow in London at the end of my 3 week trip) I was having trouble getting myself motivated to get back into my workshop.

Around the normal post-holiday adjustments, as well as preparing for my trip, I kept to my commitment to put in at least an hour on CJ each day but despite my “slow and steady” peptalk to myself a while back, I was still getting those hare-like urges to give myself a tense deadline and rush, rush, rush.

I had to remind myself of how much sheer FUN I had been having – that despite all the challenges I WAS truly enjoying myself. In particular, I got so giddy on the day that the sculpt finally started to come together that I practically skipped from the workshop when I finally had to leave for the day.

So I consoled myself with the fact that once I got back to the sculpting stage I would in all likelihood start enjoying myself more again. Right now my progress was less obvious - I had a pile of pipes, not a Prawn – when I got to the point where I could more easily see the little Prawnling slowly emerging my natural fan-girl enthusiasm would start to return and things would snowball from there.

But back to my progress (such as it was). Yes, back to the foiling stage. I endeavoured to fill out the sculpt a little more than I did the first time (although now I also knew I had enough clay to get by). I still didn’t want to get too close to the surface – I carved into the first sculpt quite a bit at one point and I didn’t want the foil so close to the surface that I denied myself that option.

I built up the various areas with foil sausages held in place with electrical tape…


Then I would wrap everything in a layer of foil and compress it.


Then I’d take a peek at one of the armature-overlaid-with-reference-pic photos I’d printed out, then continue filling out areas as needed (as you can see mainly the back of the neck and the upper chest).

Thursday, January 27, 2011

The Head Exoskeleton Is Connected To The Neck Exoskeleton...

So after a lot of running back and forth I finally hit upon an armature alignment I was happy with – albeit one that was a little more asymmetrical than I was expecting/hoping for. Unfortunately, due to the fact that you can’t buy a 4-way pipe connector, there wasn’t a way to get everything lined up properly solely by fitting the pipe pieces together – this design depended on gluing not just for stability but to actually form the design in the first place.

I mainly used putty for the shoulder/neck configuration. The tape is to show me where to line up the two pieces – the edge of the tape is meant to line up with the edge of the T-connector.

Connecting the back support (the horizontal piece on the right) to CJ’s “spine”. The T-piece on the back support will actually form the sockets for CJ’s shoulder pieces. The support beam and the spine did not line up perfectly but this could be corrected by adjusting the length of the shoulder pieces later.


The translucent strip is clear hockey tape – it’s helping pull everything together tightly while the putty sets.

The neck piece being set in place. This gives you a clearer idea of how the back support is just slightly out of alignment.


(Yes, perhaps I could have fixed it if I COMPLETELY dismantled everything and started absolutely from scratch, but I was a little discouraged at this point so I was drawing the line. The problem was fixable - one shoulder piece would have to be slightly longer than the other – so I was not going to stress out over it)

You can see here where the putty comes in handy to fill in gaps and generally make the whole thing more stable.


However, to act as reinforcement you can see where I liberally wrapped the shoulder area in electrical and hockey tape.


Here I’m using epoxy to hold the hips in place.


I had troubles before with CJ’s legs and arms coming apart at the knees/elbows. This time around I still didn’t want his limbs permanently attached to his torso but I also didn’t want them falling apart on me every time I moved them. So I decided to epoxy them together into single pieces. Here you can see where I’ve marked a knee so that everything gets glued together in the proper alignment.


Well… we’re getting there.


Wednesday, January 26, 2011

It's A Little Like Lego

… Or some other toy building set. Trying to build CJ’s new armature out of off-the-shelf ½” copper pipe pieces definitely reminded me of my lego days, crossed with the computer puzzle games my father is so fond of. Or maybe Tangrams… Here, match this shape, using only this set of pieces…

I started by building a similar shape to the shoulder rig on the 1st armature. The tape is to hold the main loop flat – you could get a surprising amount of twist from the pipe elbows.


CJ’s “neck” is pointing towards the bottom of the picture. This moves the arms back towards the spine (before they were too far forward, in-line with the neck).

This is where I really wish I had a laptop. See the method I hit upon to check the alignment of the new armature was to take a photo, run back into my bedroom where my computer was, take the pic into Photoshop and overlap the armature with the side view of CJ so that I could see how it lined up “inside” CJ.

Then I’d go back into my workshop, make any adjustments I’d think necessary, then lather, rinse, repeat. As you can see it took a bit of experimentation but little by little things came into alignment.


If you keep an eye on CJ’s knees you can see that I did experiment a little with heating and bending some pieces of plastic pipe in order to get something other than the 45 and 90 degree angles available to me with the commercial pipe fittings. In the end though I decided I could get close enough to what I needed with the commercial pieces – I’m intending that CJ’s arms and legs should bend at their joints anyways, so as long as the hips and shoulders were lined up properly it was all good in my view.

It was at this point that I had to leave CJ for a few days, on account of it being Christmas (with all the visiting, traveling, and merry-making that that normally entails).

Tuesday, January 25, 2011

Step 2.1) Past The Point Of No Return

I couldn’t quite bring myself to destroy that head I was so happy with (or those cute little Prawnling feet!) so I carefully removed them and set them aside for later…


I swear I’m not planning to eat them …

Then I stripped the rest of the sculpt down to the bare armature.


And no sooner had I pulled the last piece of clay off then I stood back and went “Oh god – what have I done?”

Couldn’t I have figured out a way to fix the proportions without taking everything apart?

Well, it was too late now. No way to go but forward!

One advantage of starting over would be that I could finally fix that not-quite-level back support beam.


So with all the clay and foil cleaned off I used a blow torch to soften the solder enough to pull the armature apart. (or most of it apart – you can see the pieces to the right).

Turns out that most of the copper connectors from the shoulder area were not reusable – they were either deformed from being pinched by the pliers I used to pull them apart, or they were so gunked up with solder and flux that they no longer fit together cleanly. So I had to go out and buy some new connectors (although I did manage to clean up a few of the older pieces after all).


I bought extras of everything this time – I had a good idea of how I was going to fix the shoulders and hips but if I was wrong I didn’t want to constantly be running back and forth to the hardware store.

Here I’m cutting the tiny pieces of pipe that will hold the connectors together.


I also decided I didn’t want to go the soldering route this time. It was finicky, I still wasn’t 100% comfortable with it, it was a pain to undo if I got it wrong, and it, as evidence by the first near disaster, it wasn’t the rock-solid bonding method I’d originally hoped for anyways.

So I asked my father if he had any recommendations. His only suggestion was some 5 Minute Epoxy (left). Next to the 5 Minute Epoxy at the Dollar Store was this repair putty (right). It was also supposed to work on metal so I decided to give it a go as well.


Here’s the putty stick. You cut off a piece and knead it together so that the inner grey part is mixed completely with the white outer part. You then have 5-6 minutes until the resulting putty hardens.


The epoxy meanwhile comes in a double syringe. You squeeze out an equal amount from both sides, mix them together and then have 5 minutes before it hardens.


So… I now had a couple ways to hold my new CJ armature together – I just had to figure out what shape that new armature would take!

Monday, January 24, 2011

The Tortoise, The Hare, And The Talking Dog

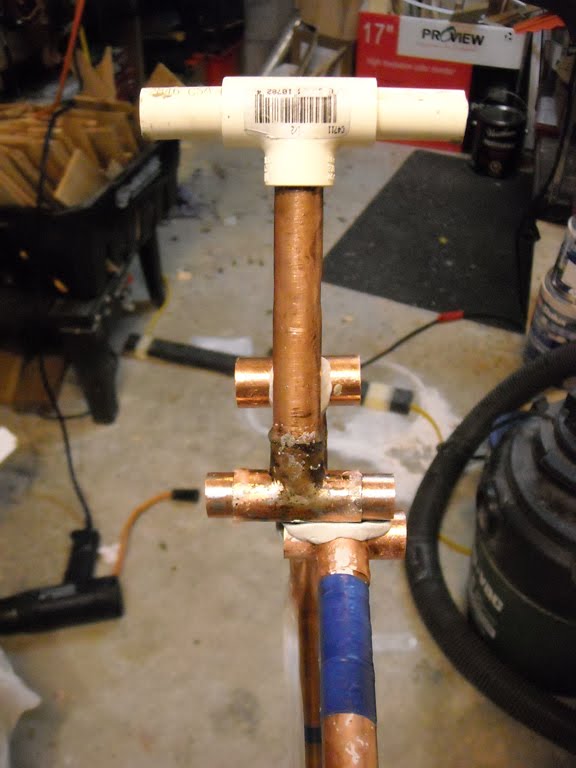
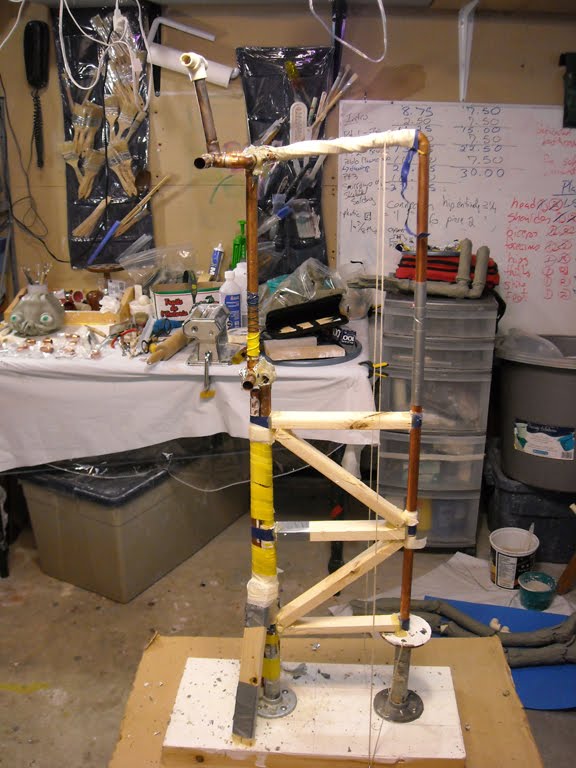
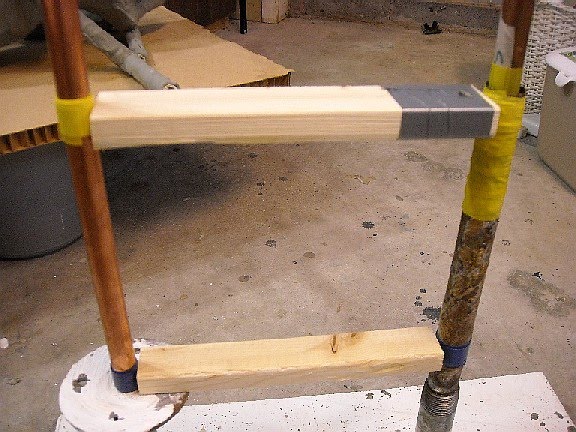
Having discovered I had made an inaccurate armature, I clearly had a decision to make – did I continue on with the sculpt as it was or did I strip off all the clay, fix the armature to be more screen-accurate, and effectively start over?

On the one hand the sculpt was starting to turn around. I was definitely happier with the way things were looking in general and with the head in particular. CJ was starting to look like, well, CJ.

And although I can be quite the perfectionist, I am not, shall we say, an Adam-Savage-&-The-Maltese-Falcon- level perfectionist.*** – that last ¾” wouldn’t necessarily make me twitch. So, in theory, I could keep going. I’d know there was something off, but if I did a good enough job with everything else, most folks seeing the puppet (minus a few super-obsessive fans and/or people who actually worked on the movie) would just go “Hey! Cool! The kid from District 9!” and not notice anything was wrong.

On the other hand – I could strip off all that clay and start over… but at the expense of missing a deadline for the 2nd time…

You see, and I’m kinda embarassed to admit this, I’d VERY naively thought, when I started this project in the Fall, that if I REALLY pushed myself I could get CJ done in time to bring him with me when I went to the International Make-Up Artists’ Tradeshow in London England at the end of my three weeks in Europe. Never mind my day job, all the normal rushing around for Christmas, my preparations for the trip itself, or oh yeah, the fact that as Maid of Honour at my sister’s upcoming wedding I had offered to both a) organize her bridal shower, and b) make her wedding dress. If I REALLY pushed I could get CJ done and oh my, wouldn’t it be fun to have him at the show with me. A real conversation starter for sure…

Well as the sheer enormity of the task I had set for myself by taking on this project set it, it was obvious I was not going to taking a fully functional Prawn puppet in my carry-on to London (my first clue? The 1st armature, something I thought I’d be able to throw together in an afternoon had taken me nearly a week and a half to assemble). But, I thought, maybe if I got the sculpt done then at least I could take some really nice in-progress pics in my portfolio… surely that would be a reasonable deadline to push for wouldn’t it?

Bit of a case of The Tortoise and The Hare really. Did I sprint head long for the finish line or did I go slow and steady but with a chance of winning the race? Well I’ve been the Hare before – MANY times, usually in a desperate attempt to finish a costume in time for a con. And I’ve gotten to the finish line alright – collapsed over it in fact and the only way I managed to stay up and running at all was by sheer momentum, willpower, and a little luck.

And that’s fine for cosplaying. There is a certain element of “talking dog syndrome” to cosplaying at a convention. Sure, fine artistry and craftsmanship are appreciated, but if you pick something really out there and ambitious for your costume you’ll get a certain amount of accolades just because you managed to pull the costume off period (no one cares what the talking dog says - everyone is just impressed with the fact it can talk at all). After all – you’re not a professional, so everyone understands that you have to make due with the materials and time limitations you have on hand.

The problem is that I want to BE a professional. I stated in the intro to this blog that it’s my dream to be a special effects artist one day and “make monsters” for a living. Even though I make costumes and puppets for the sheet love of it, I’m also supposed to be learning my craft so that it can one day be my career. And a “talking dog” attitude just doesn’t cut it for a professional.

The other problem with being the Hare is that you’re not always proud of yourself afterwards. Yes, it’s common for artists’ to be overcritical of themselves and their work but there is always a line where you COULD actually have done a better job if you’d just slowed down, and been more careful. The last time I showed my portfolio to someone I was ashamed to discover I was making excuses for almost every piece. I didn’t want that to happen with CJ…

So I made myself a deal. I would NOT give myself a deadline – I’d give myself a schedule. As long as I worked on CJ at least an hour a day (more if possible) then I’d let him take as long as he takes. 6 months, 9 months, a year – it was all good. The goal is NOT to get CJ done as quickly as possible but to do him to the best of my abilities, and hopefully learn a lot while I do it.

It’s true, if I’d done the whole sculpt and then figured out what was wrong, I might have been MORE tempted to just keep going and hope no one noticed. But I was really not so far along that starting again would set me back all that much. After all a) everything should go faster the second time and b) I’d feel better knowing things were closer to what I really wanted.

After all, he might not be the “real” CJ but he was going to be MY CJ – and I want to be proud of him when he’s all done.

Now I fully admit this might be a big load of Prawn-poop. Heck, I’M half convinced it’s a load of Prawn-poop. I know there is definitely a proper time and place for The Hare method – I’m just not convinced this is one of them. For once I want to try the way of the turtle…

*** If you’ve never watched Mythbuster Adam Savage’s presentation on Dodos, The Maltese Falcon, and The Art of Obsession I highly recommend it. At the very least you’ll get a very entertaining glimpse at what’s it’s like to research a prop/costume recreation project.

Friday, January 21, 2011

Averting Near Disaster - Emergency Space Shrimp Surgery!

So this is what CJ looked like when I started my next sculpting session…


But a little while later I noticed he’d started to look like this…


Uh CJ? Have you been getting into the cat food? You look a little tipsy…


In fact I had no sooner put the camera down after taking this shot when the entire sculpt started to topple! I JUST managed to catch him and lay him down gently in a secure spot before he went over.


What had happened? Well apparently copper is actually an extremely soft metal and the weight of the clay (far more, as I mentioned, than I anticipated using) both started to bend the copper pipe in CJ’s “spine” AND broke through my beginner soldering job at his hips. The bolt I had put through his hips as added security was not enough on its own to hold CJ upright securely.

Time for Space Shrimp Surgery!

I started by adding an extra flange & pipe base (an old one I had from a past project) behind the main base.


I got some more pipe and another copper elbow from the hardware store, thinking that if I could attach this piece to CJ’s shoulders it would help pull him upright, making him less top heavy.


Here is the clay dug out from CJ’s back, revealing where his “shoulders” meet his spine. The gold wire is what I used to pull the new support bar into place, before securing it with heavier gauge wire.


However it was clear from the test assembly (below) that this was not going to be enough to fix the problem – the second copper pipe just started to bend and warp as well.


So I mixed up some heavy duty plaster (Ultracal 30 which is really closer to a fine cement) and filled all the pipes (both the bases and the copper pipes themselves)


Then I set about bracing the base with small lengths of wood, electrical tape, and more plaster filled pipe…


I tightened the bolt at CJ’s hips and then pulled a Red Green-esque (although hopefully more MacGyver) move with hot glue like so, to immobilize the hips (since any attempt to solder the joint now would melt, if not outright burn away, the surrounding clay)


And since that actually appeared to be working (and trust me, no one was more surprised than I) I used the same technique to immobilize the wires tied around the shoulders…


After further bracing with wood, adding some guy-lines, and filling in the hole in his back with clay, CJ was standing again!


Not exactly a pretty rig – but he WAS nice and stable now. Back to sculpting! :D